
Showing posts with label html. Show all posts
Showing posts with label html. Show all posts
Monday, June 20, 2011
 The biggest problem faced by majority of newbie bloggers and web developers is editing their templates. And the reason for this is lack of awareness with browser languages like CSS, XML, HTML, JavaScript etc. There are several websites online that have tutorials in these fields and one of such websites is www.w3schools.com This website is popular because it lets you play with the code! It has an Online HTML Editor Tool that lets you see live preview of the code that you use. Many developers find this tool pretty useful but has someone ever imagined that you can actually rip this tool out of w3schools and use it offline for practicing coding while offline? Well fortunately after some trial and error we could successfully create a similar tool entitled as “MBT HTML Editor” This is the first time all bloggers are having a chance to have fun playing with important codes like CSS, HTML and JavaScript and learn important coding in a more interesting way! Now you can actually test a code before adding them to blogger.
- It works Offline in any browser available
- Takes less than a fraction of a second to show live preview
- Is equal in size to a peanut i.e 2.32 Kb
- Code is saved in browser if your PC shutdowns accidently
- You can go back several times using Ctrl + Z and go forward using Ctrl + Y
- Can be used to test a code for Cross Browser Compatibility
- It is free of charge thanks to MBT! :D
Downloading Instructions
To Download MBT HTML Editor follow the steps below,- Click this link –> MBT HTML Editor
- The MBT HTML Editor window will expand. Now you can start using it Online but to work offline in it you need to save it first. To save it click on the file menu at top-left-corner of your browser and then choose “Save As” or “Save Page As”. Select a safe location and hit enter, as shown below,

- Done!
Instructions For Using MBT HTML EDITOR
This tool consists of two panes i.e left pane and right pane. See a screen shot below,
The left pane is the area where you add your code and the right pane is the area responsible for displaying a visual view of the code. The CSS code is added just between <style> and </style> and the HTML code is added just below </style>
Playing With A Code
Lets now play with a code using our HTML Editor. I am using the Image Opacity Effect Trick here as an example.The CSS code for Opacity Effect looks like this,
img {
filter:alpha(opacity=100);
-moz-opacity: 1.0;
opacity: 1.0;
border:0;
}
img:hover {
filter:alpha(opacity=30);
-moz-opacity: 0.30;
opacity: 0.30;
border:0;
}Now to apply this effect to an image we will need an HTML code as shared below,
<img class="Fadein" src="https://blogger.googleusercontent.com/img/b/R29vZ2xl/AVvXsEiMMj-BzrdAwJGf61ym3aBR9HfeQMNg35w__h-sHf-rdPU4H93lWQ9wQF49Hzg6AYPlHM1sHXETfVXJ3CS_Eaujid_HhFHggp8BYI6sP8kaY69Jz_puJwUF8tmI9hwisoavwS69Oq3gCS47/s400/DIGG.png">
Now The best part, add the CSS code just between <style> and </style> and the HTML code just below </style>. Hit the Preview button and watch the dancing code in action in front of your eyes. You can now start the play!
See this screen shot,
Some Important Tips:-
- To go backward to previous changes, click Ctrl + Z
- To go forward to last changes made, click Ctrl + Y
- To get URL of an image saved in your hard drive suppose Drive F, open Firefox browser and simply type F: in the address bar and hit enter. That drive will open and now simply browse to that image and right click on it and then click on Copy Link Location. Alas! you got the URL. Now use this URL wherever required during your offline code editing adventure.
- Once you are happy with the code that you prepared then simply paste the CSS code just above ]]></b:skin> inside your blogger template and the HTML code where you want the effect to be seen i.e post or sidebar
Hope this Tool will be of great use to bloggers and web developers across the globe. I hope you may find it easy to better understand and learn browser languages and implement them to invent new codes with new creativities. Do let me know how useful you find it. We played our part and now its your turn to spread the message!
Note:-
I have also created a tool that lets you change special HTML Characters to Entities. It lets you add HTML code to your posts and comment section as I usually do. Hope you will like it too. You can have a look at it by click this link –> Change Special HTML Characters To Entities
Monday, June 20, 2011 0

While writing tutorials or asking a question, sometimes it becomes very necessary to post html and javascript codes in your blog comment forms powered by Blogger. You have seen many authors posting HTML effectively but when some of you try to do it, you get an error. This is because Blogger Comment form doesn't support direct posting of HTML and JavaScript. In order to help you to do that we will need to change/encode the same code into a text and then post it effectively without any error. The Tool below will help you to change HTML characters to simple text, which could be easily inserted in your blogger template and comment form. You can also use it to convert your adsense code into an embeddable form. It converts special characters in this way,
- '<' becomes '<'
- '>' becomes '>'
- '"' (double quote) becomes '"'
- ''' (single quote) becomes '''
- '&' becomes '&'
Wednesday, December 15, 2010
 Navigation menu or tab menu is the heart of every web page or blog. It provides the path way to all important pages of the website. To create a Navigation menu you must have good knowledge of CSS and HTML. But since more and more designers are sharing their tutorials online, coding has become far easier. I have brought to you a total of 30 High class navigation menus along with their CSS and HTML Codes from across the web. You just need to copy and paste the codes and that’s it!
The Horizontal Navigation Menus below are mostly created by Christopher and Highdots and some by me. I have modified most of the codes in order to make them work in blogger and have also made them pretty easy to be understood by most of you. Further all images are uploaded in my Picasa web album so no effort required on your side.
How To Add These Navigation Menus To Blogger
To add your selected navigation menu to your blogger template follow these steps,
- Go To Blogger > Layout
- Click Add a Gadget or Add a Page element
- Choose HTML/JavaScript widget
- Simple Paste the Navigation Menu Code inside HTML/JavaScript widget
- Hit Save
- Drag HTML/JavaScript widget and drop it just under your Blog Header, as shown below,

7. Finally view your blog to see something hanging below your Blog Header/Logo.
See Live Demo of MBT Navigation Menu #3
To change the links, Edit this part of the HTML in all codes below,
<li><a href="#" ><span>Link 1</span></a></li>
<li><a href="#" ><span>Link 2</span></a></li>
<li><a href="#" ><span>Link 3</span></a></li>
<li><a href="#" ><span>Link 4</span></a></li>
<li><a href="#" ><span>Link 5</span></a></li>
<li><a href="#" ><span>Link 6</span></a></li>
<li><a href="#" ><span>Link 7</span></a></li>
Replace the hash(#) sign with your Page Links /URL and replace Link1, Link2, Link3 etc with your Page Titles. If you wish to add or delete a tab then simply add or delete this line,
<li><a href="#" ><span>Link n</span></a></li>
As a designer I always look for inspiration that can be useful for both my readers and for my designing projects. I hope the resource below will be of great use to Bloggers from all platforms and to designers. Start choosing your favorite Navigation Menu and do not hesitate to ask me if you needed help in customizing it.
Tip:- To See Demo Of Other Menus, Simply Copy Paste The Code Inside MBT HTML Editor and Hit Preview To See It Live.
MBT Navigation Menu #1
No Image Used

MBT Navigation Menu #2
No Image Used

MBT Navigation Menu #3
No Image Used

MBT Navigation Menu #4
No Image Used

MBT Navigation Menu #5

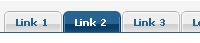
Tabs Menu #6

Tabs Menu #7

Tabs Menu #8

CSS CODE:
Tabs Menu #9
No Image Used

Tabs Menu #10

Tabs Menu #11

Tabs Menu #12
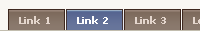
Tabs Menu #13

Tabs Menu #14

Tabs Menu #15

Tabs Menu #16

Tabs Menu #17

Tabs Menu #18

Tabs Menu #19

Tabs Menu #20
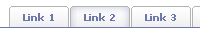
Tabs Menu #21
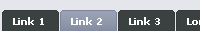
Tabs Menu #22

Tabs Menu #23

Tabs Menu #24
No Image Used
Tabs Menu #25

Tabs Menu #26

Tabs Menu #27

Tabs Menu #28

Tabs Menu #29
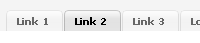
Tabs Menu #30
Wednesday, December 15, 2010 0
Sunday, November 21, 2010
 After the release of 30+ Horizontal Navigation Menus, we head forward to a beautiful collection of some of the best looking vertical navigation menus that will put soul to anyone’s weblog or website! I have modified the codes made by Christopher and Highdots and have made them compatible with Blogger. I hope this collection will be of interest to most of you simply because these navigation menu tabs can easily be installed, customized and multiplied! I hope it will be of great help to new designers :>
How To Add A Vertical Navigation CSS Menu To Blogger?
Well the process is as simply as it can be. Simply follow these steps carefully,- Go To Blogger > Layout > Edit HTML
- Back-up your template
All Navigation Menus below uses two pieces of codes. One is The CSS code which is responsible for the look and feel of the menus and the second is the HTML code which is responsible for positioning the menus. So lets know where to add each code!
3. Paste the CSS code for your selected Menu just above ]]></b:skin>4. For the HTML code there can be two positions either your right sidebar or left sidebar. Depends how many columns you have.
- If you have a right sidebar then paste the HTML code just below <div id='sidebar-wrapper'> or this <div id='sidebar-wrapper-right'>
- If you have a left sidebar then paste the HTML code just below <div id='sidebar-wrapper-left'>
Note:- Since most templates use different coding therefore if you could not find the above codes then don’t worry simply share your blog URL in the comment box and I will view your template coding and will tell you instantly which code to search for!
5. Finally save your template and see a beautiful Navigation Menu hanging on your sidebar :DEditing The Links In The Navigation Menu
To change the Tab Menu Links and Titles, simply edit this bolded part of the HTML code,<li><a href="#1" >Link 1</a></li>
<li><a href="#2" >Link 2</a></li>
<li><a href="#3" >Link 3</a></li>
<li><a href="#4" >Link 4</a></li>
<li><a href="#5" >Link5</a></li>
Replace #1, #2, #3 etc with your Page Links/URL and replace Link1, Link2, Link3 etc with your Page Titles. If you wish to add or delete a tab then simply add or delete this line from the HTML code,
<li><a href="#" >Link</a></li>
For Live Demo of Other Navigation Menus Simply use our HTML Editor and Copy and Paste the CSS and HTML code at right areas and then start playing with the code :>>
Navigation Menu #1

CSS CODE:
HTML CODE:
Navigation Menu #2

CSS Code:
HTML Code:
Navigation Menu #3

CSS Code:
HTML Code:
Navigation Menu #4

CSS Code:
HTML Code:
Navigation Menu #5

CSS Code:
HTML Code:
Navigation Menu #6

CSS Code:
HTML Code:
Navigation Menu #7

CSS Code:
HTML Code:
Navigation Menu #8

CSS Code:
HTML Code:
Navigation Menu #9

CSS Code:
HTML Code:
Navigation Menu #10

CSS Code:
HTML Code:
Navigation Menu #11

CSS Code:
HTML Code:
Navigation Menu #12

CSS Code:
HTML Code:
Navigation Menu #13

CSS Code:
HTML Code:
Navigation Menu #14

CSS Code:
HTML Code:
Navigation Menu #15

CSS Code:
HTML Code:
Navigation Menu #16

CSS Code:
HTML Code:
Navigation Menu #17

CSS Code:
HTML Code:
Navigation Menu #18

CSS Code:
HTML Code:
Navigation Menu #19

CSS Code:
HTML Code:
Navigation Menu #20

CSS Code:
HTML Code:
Navigation Menu #21

CSS Code:
HTML Code:
Navigation Menu #22

HTML Code:
Navigation Menu #23

CSS Code:
HTML Code:
Navigation Menu #24

CSS Code:
HTML Code:
Navigation Menu #25

CSS Code:
HTML Code:
That’s All!
Hope you have enjoyed the post. Feel free to ask any question related to these navigation menus. I am happy I fulfilled my promise of publishing this post :)
Sunday, November 21, 2010 0
Subscribe to:
Posts (Atom)


